SeamLock Pro and SeamLock are high-performance adhesives available in cartridge form, designed for bonding solid surface, natural stone, quartz, marbles, sintered and porcelain substrates in various applications.
This guide will provide step-by-step instructions on how to achieve strong and durable adhesion using SeamLock with a 250ml dispensing gun, whether it’s a pneumatic or manual dispensing gun.
Find “Materials Needed” and “Step-by-Step Instructions” below the video.
SeamLock How-To Videos
Intro To SeamLock
How Much do I Need?
No-Drip vs Flowing
Prep – Best Practices
Prevent Soft Spots
Storing Your Adhesive
Cinnamon Scent
Do A Test Seam
How To Find A Color Match
SEAMLOCK INSTRUCTIONS
Materials Needed:

- SeamLock Pro or SeamLock adhesive cartridge
- Tip
- 250ml dispensing gun (pneumatic or manual)
- Clean cloth or sponge
- Denatured alcohol or acetone
- Painter’s tape blue or green (for hard surface materials)
- Clamps (if needed)
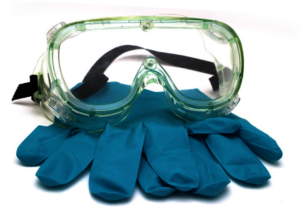
- Protective gloves
- Safety goggles
Step-by-Step Instructions:
1. Surface Preparation:
- Ensure that the surfaces to be bonded are clean, dry, and free from any debris, dust, or grease.
- Use denatured alcohol and a clean cloth or sponge to thoroughly clean the substrates, removing any residues or contaminants. Many times for light colored surfaces, dirty hands or pencil marks will leave a blackened area if in the seam area. Check cut for any colors on the seam due to the saw blade.
- Protect adjacent surfaces or areas that you do not want to apply the adhesive to by applying painter’s tape for hard surface seaming.
- Before you actually seam up anything, do a quick color check by seaming up a small scrap of representative material to check that the glue color actually matches the sheet color, and the seam is inconspicuous.
2. Cartridge and Dispensing Gun Setup:

- Insert the SeamLock Pro or Seam Lock cartridge into the 250ml dispensing gun, following the manufacturer’s instructions.
- Make sure the cartridge is securely seated in the gun and properly aligned.
3. Application:

- Put on protective gloves and safety goggles before starting the application.
- Dispense a small amount of adhesive onto a scrap material or disposable surface to ensure the proper flow and consistency, meaning balancing of the pistons both the resin and the activator. Once balanced, attach the static mixing tip using the cam lock nut over the tip. Now dispense 8 to 10” of adhesive onto the scrap cardboard or into the trash can. You are now ready to dispense adhesive on the sheet.
- Apply a bead of adhesive to one of the surfaces using the dispensing gun, starting at one end and moving steadily. It is generally better to lay a thin bead over another thin bead than to dispense a thick bead.
- Ensure that the adhesive is applied evenly and covers the surface appropriately, avoiding excessive application.
4. Joining the Surfaces:
- Align the surfaces to be bonded and carefully press them together, applying even pressure.
- Ensure proper alignment and adjust if necessary.
- Wipe away any excess adhesive that may squeeze out from the edges using a clean cloth or sponge.
5. Curing and Finishing:
- Allow the adhesive to cure according to the manufacturer’s instructions. This may take several hours or overnight.
- Once the adhesive is fully cured, inspect the bond for any imperfections or rough spots, or scrape with a razor blade or a seven in one tool.
- Use a razor blade or scraper to carefully remove any excess adhesive or rough edges, ensuring a smooth and seamless finish.
6. Post-Installation Care:
- Follow any recommended care and maintenance guidelines provided by the adhesive manufacturer.
- Avoid subjecting the bonded surfaces to excessive stress or heavy loads until the adhesive has fully cured.
- Regularly clean and maintain the bonded surfaces according to the specific requirements of the natural stone or porcelain material.
Conclusion:
By following these step-by-step instructions and using a 250ml dispensing gun with SeamLock Pro or SeamLock cartridges, you can achieve strong and durable adhesion for solid surface, natural stone, marble, granite, sintered and porcelain substrates. Remember to wear protective gloves and goggles throughout the process and follow the manufacturer’s guidelines for proper cartridge and dispensing gun usage.
